Vector graphics files are perfect for T-shirt printing. They are super easy to edit, and you can enlarge them without loss of quality. Find out how you can vectorize images with Illustrator in a matter of clicks!
File types like .jpg and .png are widely used, as they are classic pixel graphic formats. Pixel graphics consist of a limited number of small elements (pixels), the number of which can’t be changed. This means that if you enlarge the image above its maximum size determined by the number of pixels, the resulting image will look pixelated (blurred and fuzzy). Vectorizing with Illustrator remedies this issue.
Vector graphics use polygons to represent images in computer graphics. The vectors they are based on lead through locations called “control points” or “nodes”. Each of these points has a definite position on the x- and y-axes, and determines the direction of the path. Each path may be assigned various attributes, including values like stroke color, shape, curve, thickness and fill. Most importantly, the image’s sharpness remains, and that’s perfect for creating T-Shirt designs.
Vectorising images in Illustrator – from drawing to vector file
The Illustrator software helps you turn your sketch into a flexible vector file. The older full version of Illustrator, called CS2, can be downloaded for free, but only if you have a valid license to the product. The current Illustrator CC version can be downloaded and used as a trial version for 7 days.
- Drawing and scanning
- When drawing a sketch, be sure to clearly define the lines in as rich a contrast as possible.
- Scan your sketch instead of taking a picture of it (better for seamless digitalization), and save it in either .jpg or .png format.
- Pencil sketches are best scanned in black & white.
- If you don’t have a scanner or good camera handy, make sure there’s enough light (and no shadows) when taking a picture of your sketch. Try holding the camera completely parallel to the paper.
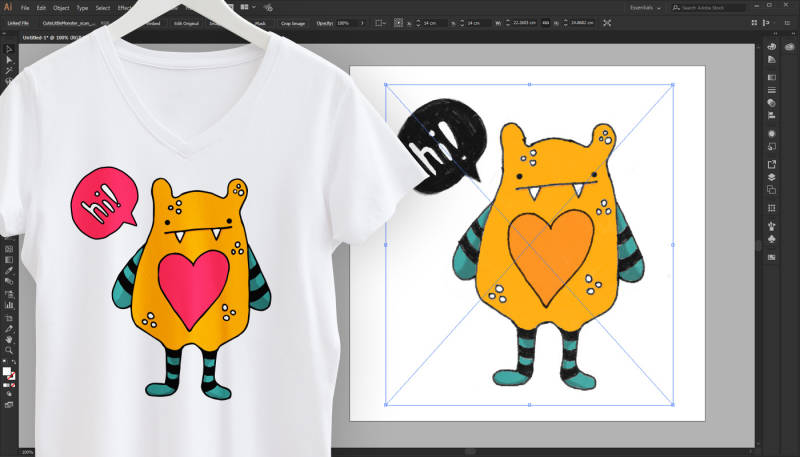
- Open in Illustrator
- Open Illustrator and create a new drawing canvas: File -> New. A new window will open, and you’ll be able to choose your canvas size (height and width) in the settings on the right. For T-shirt designs, a size of 38x38cm (15″x15″) is ideal.
- Now open your image file: File -> Place
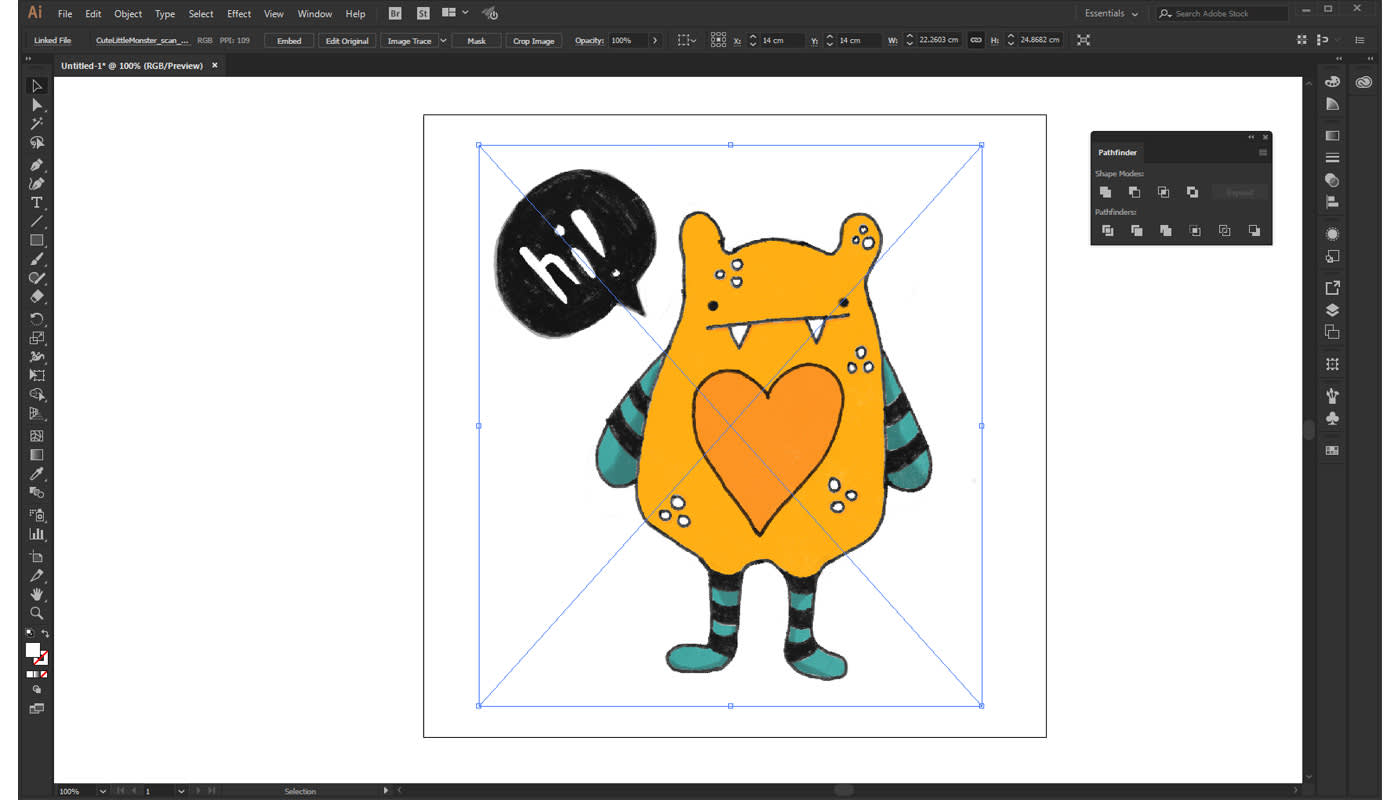
- Using the image trace tool
- Go to your menu, and select “Window” then ”Image Trace”. You can choose color options and threshold values in the new window.
- Once you have done this, click on “Trace” in the bottom-right corner to render your sketch into a vector graphics file.

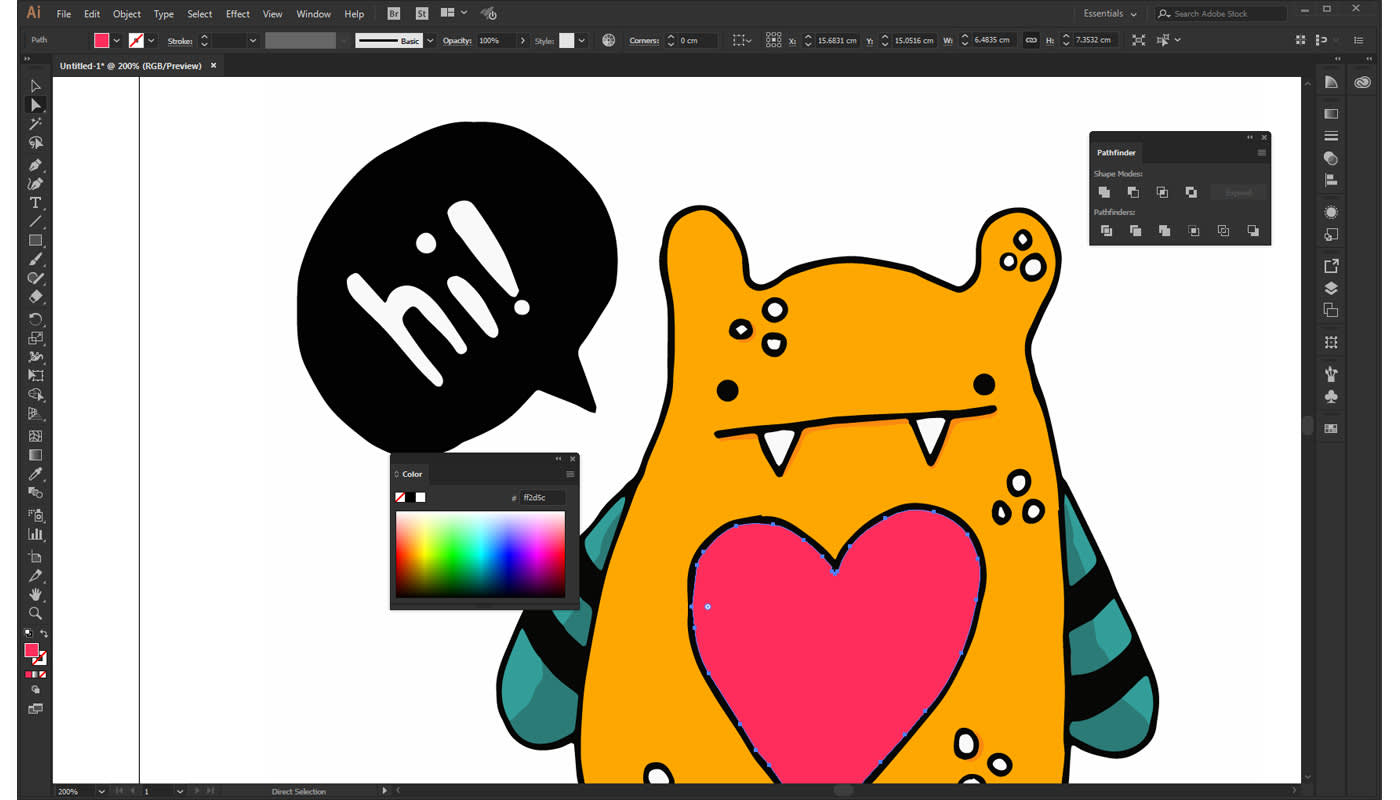
- Small corrections
- Choose “Expand” to enter editing mode.
- You can delete the background of your graphics by selecting the background with the “Direct Selection Tool” in your tool box and hitting the delete button.
- You can also switch colors: Window -> Color
- Saving the image
- Go to File -> Save and enter a name for your graphic. The file format is called “.ai”. You’ll see a new window in which you can go to “Version” and choose “Illustrator 3” so you can open and edit the file with an older version of the software at a later point in time.
What’s next? Your vector file can be used for a variety of purposes. How does using it for creating T-shirts and making money with designs sound? Every time you sell a T-shirt, you’ll be earning a price you can freely set for your design. The free online shop system and Spreadshirt’s Marketplace offer two straightforward ways for selling your designs, risk-free and without any hassle. Check it out!
Did you know, you can make money with that creativity of yours? See how you can monetize on your designs by opening a FREE online shop today!