New year, new tutorial! We’ll be continuing our very popular DIY series in 2015 to provide you with creative ideas for getting the best out of your threads. Today it’s fashion expert Astrid who runs the Sp4nk blog, giving you a few insights in how to add a bit of glamour to a wintery jumper with pearls and an extra portion of magic. Get ready for this:
You need:
- A cotton jumper, e.g. by Stanley & Stella
- White appliqué pearls in different sizes, for example:
- 10 pearls à 6 mm
- 6 pearls à 6 mm
- 6 pearls à 6 mm
- Embroidery thread, e.g. by DMC
- 8m plain blue satined (e.g. by Mouliné Satin Bleu (S798) – blue)
- 8m multicoloured blue mottled (e.g. by Mouliné Color variation (4020) – blue tie & dye)
- White embroidery thread
- …and also scissors, embroidery needle, sewing needle and a fine liner (pen).
Step 1 – Draft up your design
First I drew a wave pattern on paper and then transferred the main dots directly onto the jumper. If you don’t feel like transferring the design freestyle, you can also use tracing paper as described in this tutorial.
And you can use my draft as an example.
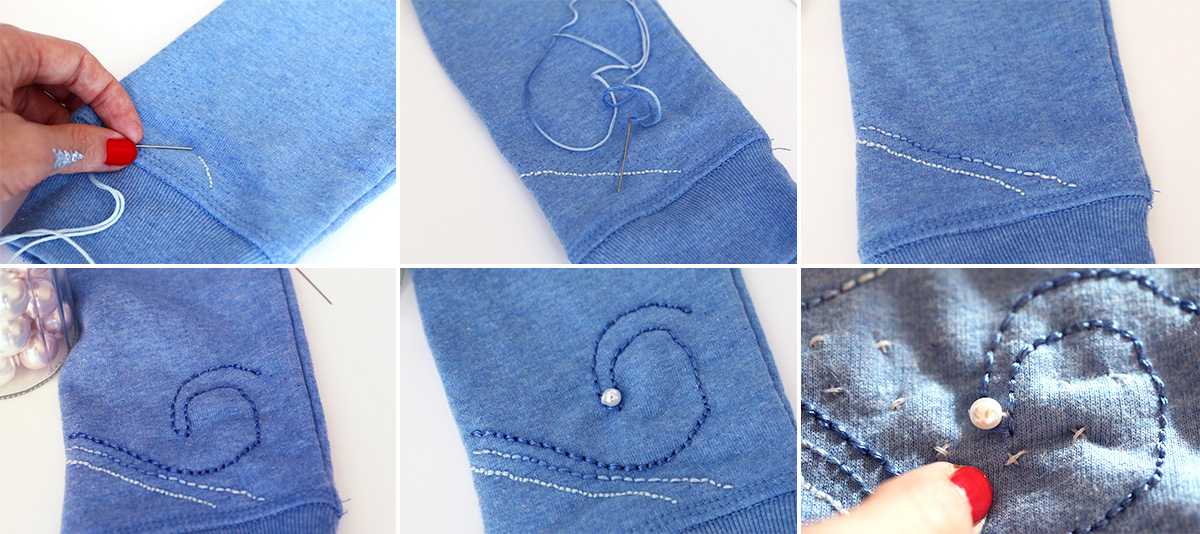
Step 2 – Embroider your design
Once you have transferred the dots to your jumper, you only need to embroider the wave pattern. I used a variety of blue nuances to bring out a bold relief. The inner lines were made with multicoloured Tie & Dye thread, and the contours were accentuated by blue satined thread.
I then started to stitch the pearls on the jumper. First the small 6mm pearls, and then – for the second wave – the 8mm pearls. For the fifth wave, I used the 6mm pearls again, and for the shoulders the 20mm pearls. If all this may sound a wee bit confusing, take a look at the image (I only forgot the small pearl in the first wave).
In order to embroider the first sleeve, you need a bit of patience – but it’s worth it! Take your time with the sleeve and you’ll see that the jumper will receive a very stylish look. No need doing it in one go, though, you’ll probably be best off putting it down after 20 minutes or so and to get back to it later. And you can be sure that the final result will be well worth the effort, I hope you like what I came up with as well!
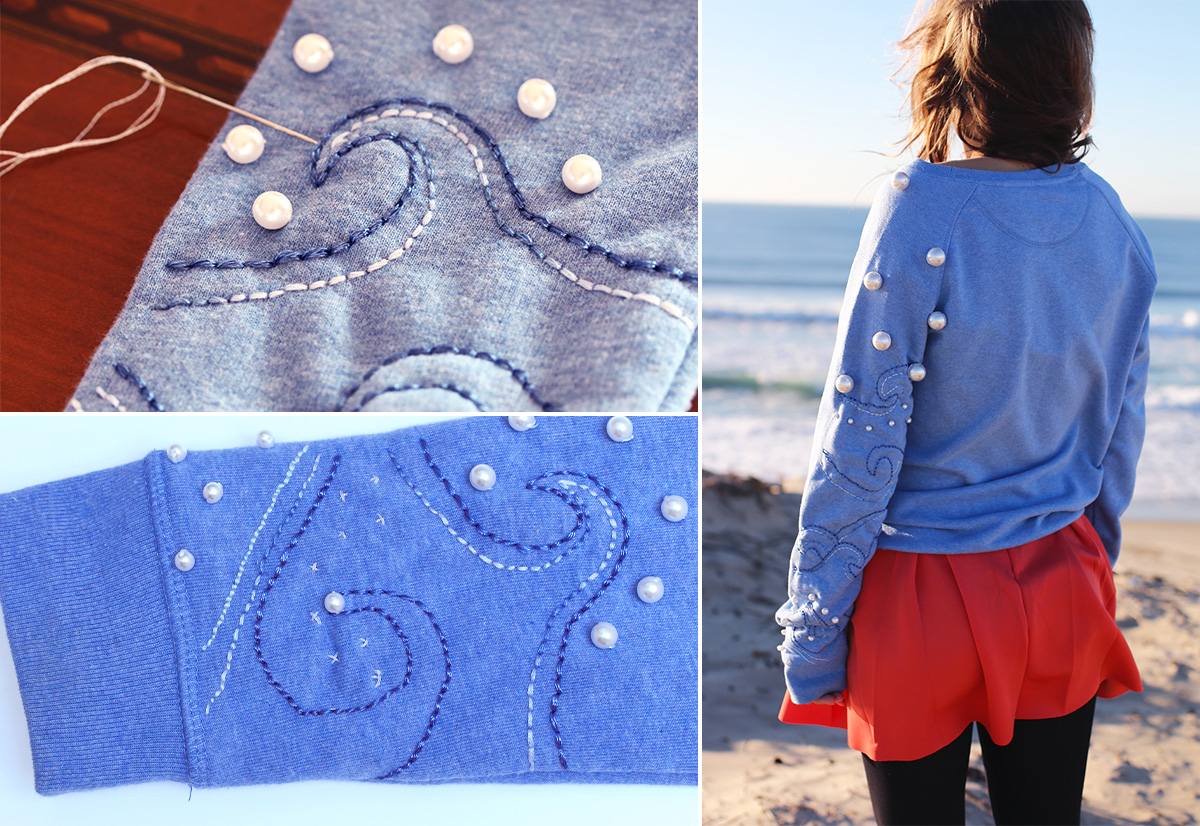
The result
This is what it looks like when it’s done.
I only embroidered and adorned one sleeve so that it a) stands out, and b) I can still put my bag over the other shoulder without getting stuck on the pearls. Of course you can embroider both sleeves as well, if you like 😉
A big up to Astrid for supplying this tutorial! Did you like it? It would be great if you could share your experience with us below!